How To Update SeaLINK Ethernet Serial Firmware
The Firmware Update Process
Updating the firmware on a SeaLINK Ethernet serial server takes approximately one minute to complete. This article details the steps required to update the firmware and covers two methods. Prior to SeaLINK v2.3.22 firmware, the SeaLINK Configuration Utility is required. With SeaLINK v2.3.22 firmware and later, the SeaLINK web administration page simplifies the update process.
Important!Device configuration settings will be lost after completing the firmware update. All custom configuration settings should be documented before beginning the update procedure. The SeaLINK device will need to be configured after completing the update.
Caution:When using the SeaLINK Configuration utility, the use of an uninterruptable power supply is recommended to prevent loss of power during the update. It is also recommended that the device be directly connected to the Ethernet port of the host computer using the crossover cable included with the device. In rare instances where the firmware update fails due to power loss or communication failure, it will be necessary to return the unit to Sealevel Systems for repair.
Note:With SeaLINK v2.3.22 firmware and later, updating the firmware through the web administration page is immune to communication failures. It is not necessary to use a crossover cable. However, it is still recommended to use a UPS to protect against a power failure, which would result in a return for repair situation.
Launch SeaLINK Config
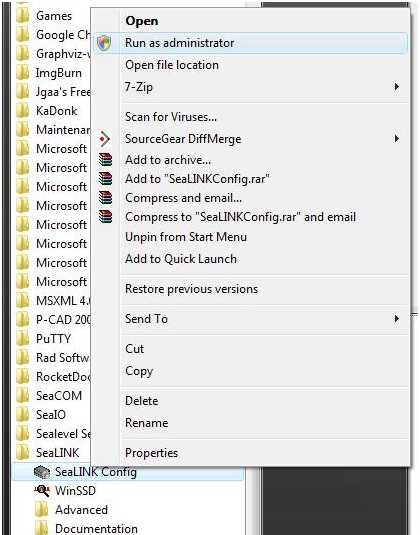
The SeaLINK Configuration utility is part of the SeaLINK Software Installation package (v4.8.4+). In Microsoft Windows Vista, it is necessary to run the application as an ‘Administrator’. Click on Start -> All Programs -> SeaLINK. Right-click on SeaLINK Config. In the fly-out menu, select ‘Run as Administrator’.
SeaLINK Config will be used to determine the current version of the firmware installed on the SeaLINK Ethernet serial server. For older SeaLINK firmware (before v2.3.22), the SeaLINK Configuration utility can also be used to update the SeaLINK device firmware.
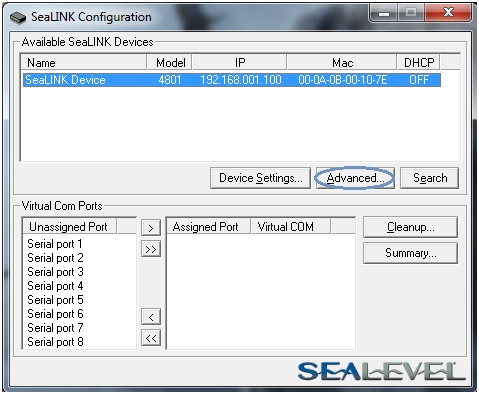
Click the Advanced Button
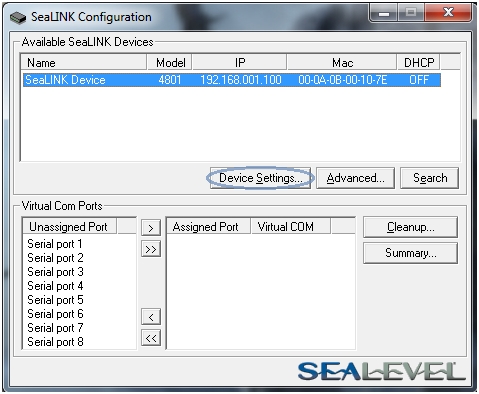
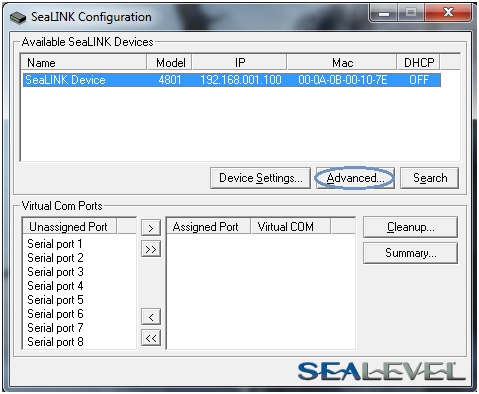
Choose the desired SeaLINK device from the list of devices detected by SeaLINK Config. Click the “Advanced” button, as shown in the image below. This will launch the web configuration utility in the default browser.
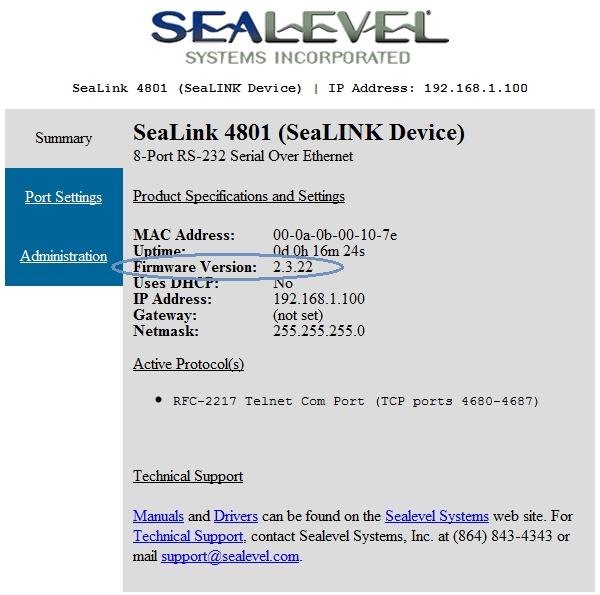
Determine Current Firmware Version
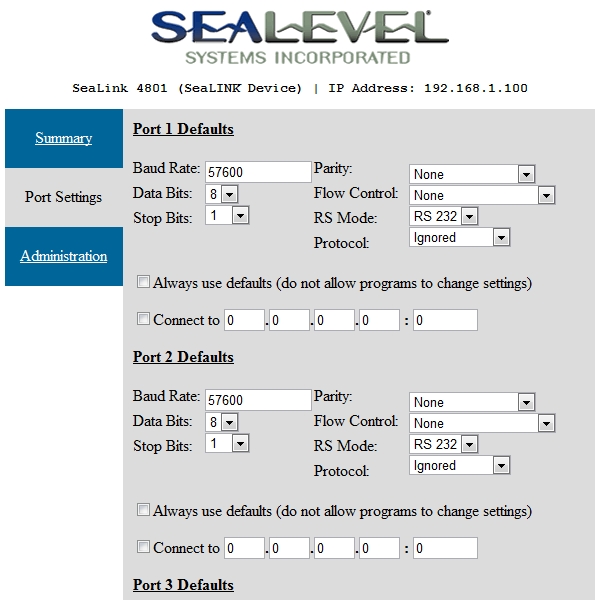
When the browser opens with the web configuration utility, the ‘Summary’ tab will display the current firmware version with other basic device information. Click on the ‘Port Settings’ and ‘Administration’ tabs and record any custom configuration settings for the SeaLINK device. Custom settings will be cleared during the update and returned to factory defaults.
Make note of the firmware version.
Download Updated Firmware
The latest version of the SeaLINK firmware can be downloaded from the link at the bottom of this article.
Compare the version number to the installed version and proceed if necessary. Click the file to download and save it to an accessible location such as the Desktop or My Documents folder.
Web-Based Firmware Update
Prior to downloading the firmware, you made note of the firmware version. If you see a version older than 2.3.22, you will need to use the SeaLINK Config utility to update the firmware. Skip this step and continue with the remaining steps.
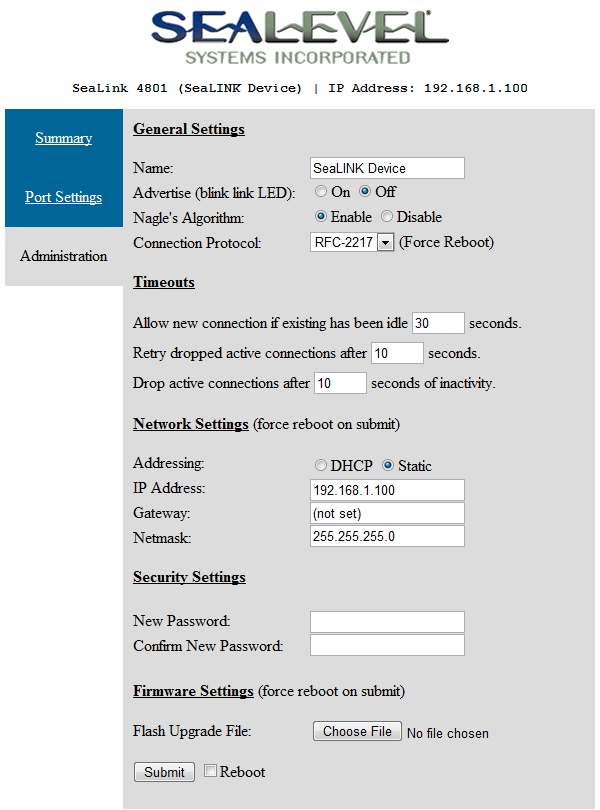
If you see version 2.3.22 or newer, you can update the firmware via the web interface. Click on the ‘Administration’ tab. At the bottom of this page is a field, ‘Flash Upgrade File’. Click the ‘Browse’ button and locate the firmware file you downloaded in the previous step. The SeaLINK firmware will end with ‘_APP.s19’. Once you have navigated to its location, click the ‘Open’ button. Once the field is populated with the firmware update file, click the ‘Submit’ button.
Depending on network speed and other factors, the firmware update will take less than one minute to complete and then the SeaLINK device will reboot. If the webpage doesn’t refresh, click on the ‘Advanced’ button in SeaLINK Config to launch the web configuration utility.
On the ‘Summary’ tab, the updated firmware version is displayed with other basic device information. Click on the ‘Port Settings’ and ‘Administration’ tabs to reconfigure the SeaLINK device using the settings you recorded prior to starting the firmware update. The firmware update and device configuration is complete.
Open Device Settings
In the SeaLINK Config window, click the ‘Device Settings…’ button as shown.
Click Update Firmware Button
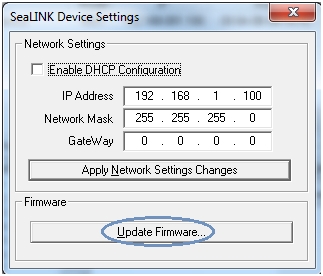
The SeaLINK Device Settings window opens. Basic network settings are configured for the SeaLINK device in this window. Click the ‘Update Firmware…’ button located below the network settings options.
Click the Browse Button
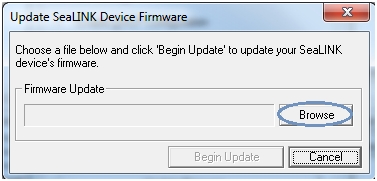
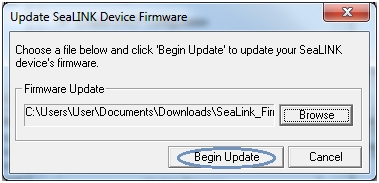
Click the Browse button and locate the firmware update that you downloaded in an earlier step.
Locate the Firmware File
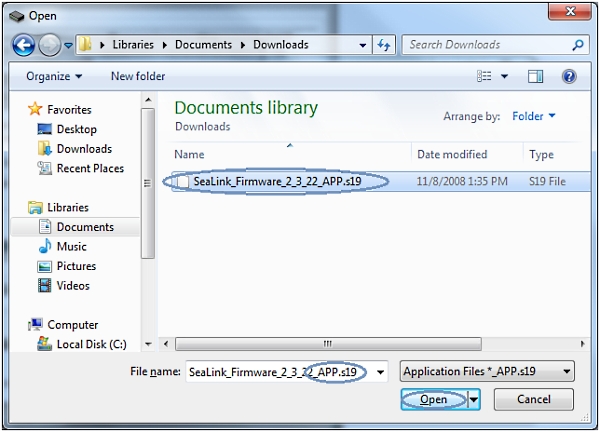
The SeaLINK firmware will end with ‘_APP.s19’. Once you have navigated to its location, click the ‘Open’ button.
Click Begin Update Button
Once you have located the firmware file, click the ‘Begin Update’ button.
Firmware Update Complete
When the update process completes, the SeaLINK device will be fully updated. Click the Advanced button in SeaLINK Config to open the web configuration utility to verify the updated firmware version and reconfigure the SeaLINK device.
Web Configuration Utility
The web administration page for the device will appear in the default browser. On the “Summary” tab, the firmware version is displayed with other basic device information. Click on the “Port Settings” and “Administration” tabs to reconfigure the SeaLINK device using the settings you recorded prior to starting the firmware update.
Tech Support
If you experience any problems with the firmware update, contact Sealevel technical support at [email protected] or call 864-843-4343 for assistance.
Categories:
